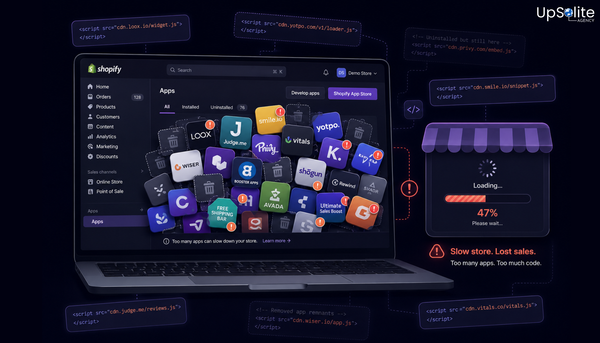
Migrating from WooCommerce to Shopify is a smart move for most growing stores. Shopify’s infrastructure, checkout experience, and support are genuinely better. But migrations quietly destroy search rankings every single day — not because Shopify is worse for SEO, but because the migration itself is handled carelessly.
Your existing SEO equity lives in specific URLs, page titles, meta descriptions, structured data, and backlinks pointing at your old WordPress domain. Move everything without a plan and Google sees a different website. Move it with a plan and your rankings transfer with you.
This guide covers every layer of that plan — including the parts most migration checklists skip.
Why Migrations Kill Rankings (When Done Without a Plan)
A Shopify migration changes your URL structure. WooCommerce stores typically have product URLs like /product/blue-running-shoes/. Shopify uses /products/blue-running-shoes — no trailing slash, no product folder. Categories that lived at /product-category/shoes/ now live at /collections/shoes.
Every one of those changes breaks an existing link in Google’s index. If you don’t redirect old URLs to new ones, you’re telling Google: that page is gone. The authority built up over months or years disappears. Backlinks from other sites point to 404 pages. Your rankings drop, and they don’t always recover.
The fix isn’t complicated — but it requires doing the work before launch, not after.
URL Mapping: What It Is, Why It Matters, How to Do It
URL mapping is the process of creating a documented match between every URL on your old site and its new equivalent on Shopify. Think of it as a forwarding address list — for every old location, you’re specifying exactly where content has moved.
You’ll implement these as 301 redirects (permanent redirects), which tell Google: this content has permanently moved here, transfer all ranking signals to the new location.
Step 1: Crawl Your Existing WooCommerce Site
Before touching anything, crawl your site with Screaming Frog (free up to 500 URLs) or Sitebulb. Export every URL that returns a 200 status. This is your source of truth.
Focus on:
- Product pages — highest individual SEO value
- Category pages — often rank for broader, higher-volume terms
- Blog posts — backlink magnets and long-tail traffic drivers
- High-traffic pages from Google Search Console → Pages report
Step 2: Build the Mapping Spreadsheet
Create a spreadsheet with three columns: old URL, new URL, and priority (based on current traffic and backlinks). For standard WooCommerce-to-Shopify patterns, these rules apply to 80% of your URLs:
| WooCommerce pattern | Shopify equivalent |
|---|---|
| /product/[handle]/ | /products/[handle] |
| /product-category/[name]/ | /collections/[name] |
| /shop/ | /collections/all |
| /?p=123 (query string IDs) | /products/[matching-handle] |
| /blog/[post-slug]/ | /blogs/insights/[post-slug] |
The remaining 20% — products with custom slug structures, pages with URL parameters, faceted navigation paths — need to be matched manually. This is where the real time goes.
Step 3: Implement Redirects in Shopify
Shopify’s native redirect tool handles this cleanly. Go to Online Store → Navigation → URL Redirects. You can bulk import via CSV with two columns: Old URL and New URL. For stores with thousands of URLs, Shopify’s Admin API redirectCreate mutation lets you script the entire import.
One rule to follow without exception: no redirect chains. If A already redirects to B, and B needs to redirect to C, update A to point directly to C. Every extra hop dilutes the ranking signal transfer and adds latency.
What Good vs. Bad Redirect Setup Looks Like
The Bad Setup
A store migrates to Shopify and adds only category-level redirects:
/product-category/shoes/ → /collections/shoes/shop/ → /collections/all
They skip individual product redirects because “Google will figure it out.” What actually happens: hundreds of product pages return 404s. Google begins de-indexing them within weeks. Rankings for specific product terms disappear. Organic traffic drops and doesn’t recover on its own timeline.
The Good Setup
The same store runs a pre-migration crawl, exports every URL, builds a full mapping spreadsheet, and bulk-imports all redirects before the DNS switch. All redirects are direct (no chains). All redirects point to the canonical, indexable version of the new URL.
Post-migration traffic typically dips 5–15% as Google re-crawls and re-validates. Rankings stabilise within 4–8 weeks. No permanent equity loss. The difference between these two outcomes is one spreadsheet and an afternoon of work done before launch.
The Complete Migration SEO Checklist
Before Migration
- Crawl existing site — export all 200-status URLs
- Export Google Search Console data: top pages, queries, and backlinks
- Document all title tags and meta descriptions from high-traffic pages
- Note all pages with structured data (Product, Article, FAQ, BreadcrumbList schema)
- Build complete URL mapping spreadsheet (old → new)
- Audit all external backlinks via Ahrefs or Search Console → Links report
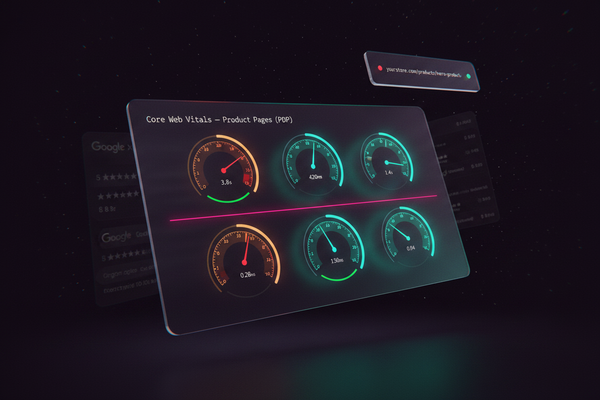
- Capture existing Core Web Vitals scores as a baseline
During Migration
- Match all title tags and meta descriptions on Shopify — improve where possible
- Ensure image file names and alt text match or improve on originals
- Verify canonical tags are correct (Shopify themes handle this automatically for most cases)
- Implement all URL redirects before the DNS switch goes live
- Confirm robots.txt allows Googlebot on the new domain
- Test every redirect — each should resolve in a single hop, not a chain
After Launch
- Submit updated XML sitemap to Google Search Console
- Request re-indexing for your top 20 URLs via the URL Inspection tool
- Monitor Search Console for 404 errors every week for the first 60 days
- Watch Core Web Vitals — Shopify’s CDN often improves LCP scores vs. self-hosted WordPress
- Check Crawl Stats in Search Console for indexing velocity and crawl anomalies
This Takes Longer Than You Think — Plan for It
Most migration timelines assume a two-week project. The technical migration itself — products, customers, orders, content — can be done in that window for most stores. The SEO layer consistently takes longer, for three reasons:
- The crawl and mapping work is manual. For a 3,000-URL WooCommerce store, building a complete and verified mapping spreadsheet takes two to three days of focused work, not two hours. Rushing this is where permanent ranking loss happens.
- Edge cases surface late. URL parameters, faceted navigation paths, old promotional landing pages, canonicalization decisions on duplicated content — these issues appear when you’re deep in the crawl data, not in a kickoff call.
- Post-launch monitoring takes real calendar time. Google re-indexing can take 4–8 weeks depending on your crawl budget and domain age. You won’t know if something went wrong until well after launch.
Build your launch date around the mapping work being done, not the other way around. Launching on time with incomplete redirects costs you more than launching a week late with everything in place.
How We Handle This at UpSolite
SEO preservation is a non-negotiable part of every migration we run. We crawl the existing site before any migration work starts, build a complete URL map, and implement redirects as part of the launch checklist — not as an afterthought. Post-launch, we monitor Search Console until rankings stabilise.
If you’re planning a WooCommerce to Shopify migration and want it done without ranking loss, we’d be glad to scope it out with you. No commitment required — just a clear picture of what the project involves.